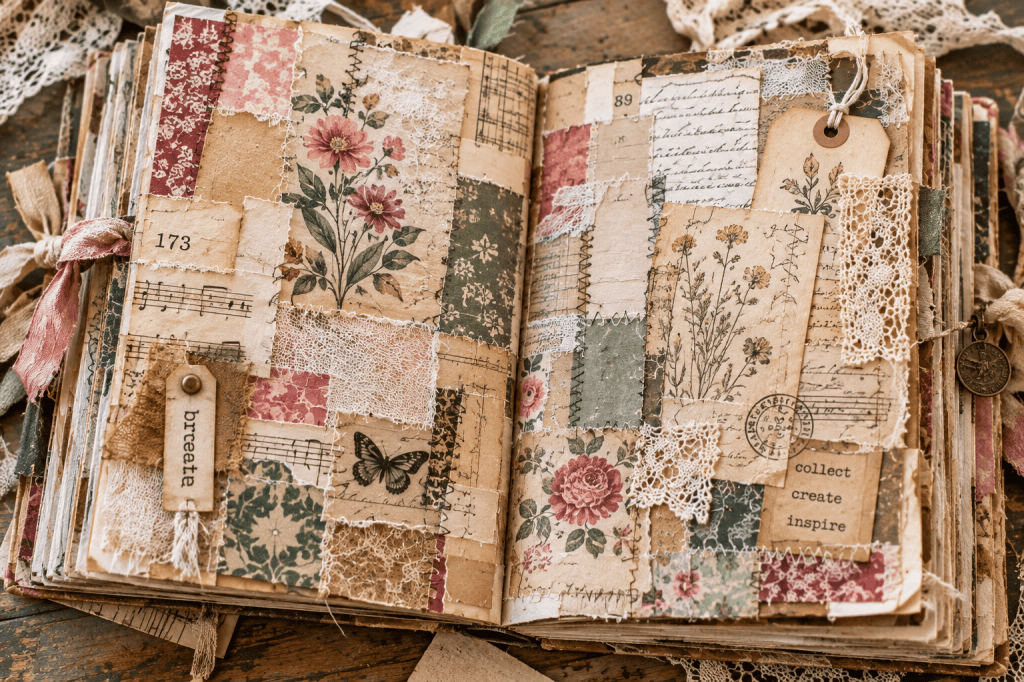
If you’re new to junk journaling, it can sometimes feel like everyone else knows a secret language.
Frankenpages. Masterboards. Tuck spots. Fabric flips. Clusters.
What does all of that mean?
The good news is that some of the techniques that sound the most complicated are actually incredibly simple. Many of them have been used by junk journalers for years, and I think they’re worth rediscovering—especially if you’re a beginner.
You don’t need expensive supplies. You don’t need perfectly coordinated papers. And you definitely don’t need every page to look like something you saw on Pinterest.
In fact, some of these techniques are at their best when they’re a little imperfect.
So grab that box of scraps you’ve been saving, and let’s look at 10 old-school junk journal techniques you can actually do.
1. Frankenpages
Let’s start with one of my favorites.
A Frankenpage sounds much more complicated than it is. You’re basically taking all those little scraps you’re convinced you’ll use someday and finally giving them a job.
WHAT IS IT?
A Frankenpage is created by piecing smaller scraps of paper together to make a completely new sheet or page.
Think of Frankenstein—but with paper!
Different pieces are joined together to create something new, and they don’t have to match perfectly. That’s part of what makes it interesting.
WHAT DO I NEED?
Not much!
Gather paper scraps, old book pages, leftover scrapbook paper, music paper, envelopes, ledger paper, maps, packaging or anything else you’ve saved.
You’ll also need glue or a sewing machine—or both.
HOW DO I DO IT?
Start arranging your scraps so that their edges overlap slightly.
Don’t spend too much time trying to make everything coordinate. Move pieces around until you like what you’re seeing.
Glue them together or stitch across the seams. You can use straight stitching, zigzag stitching or intentionally crooked stitching.
Keep adding scraps until you’ve created a larger piece of paper.
That’s it.
You’ve made a Frankenpage.
WHAT CAN I USE IT FOR?
Almost anything!
Use it as a journal page, fold it into a pocket, turn it into a journal cover, cut it into tags or journal cards, make an envelope from it or use pieces of it as embellishments.
BEGINNER TIP
Don’t try to make it perfect.
A crooked seam or torn edge isn’t a mistake. Frankenpages are supposed to look pieced together.
2. Masterboards
If you’ve ever stared at a blank tag wondering how to decorate it, try making a masterboard instead.
WHAT IS IT?
A masterboard is one large collage that you later cut into smaller pieces.
Instead of designing ten individual tags, you create one big piece of art and then let the cuts determine what each smaller piece looks like.
WHAT DO I NEED?
A large piece of cardstock or sturdy paper, paper scraps, book pages, labels, stamps, paint, images and glue.
Use whatever you already have.
HOW DO I DO IT?
Cover your large sheet with scraps and collage materials.
Layer pieces over one another until most or all of your background is covered.
Add stamping, paint, ink or other marks if you’d like.
Once everything is dry, cut your masterboard into smaller shapes.
WHAT CAN I USE IT FOR?
Turn those pieces into tags, journal cards, pockets, belly bands, bookmarks, tuck spots and embellishments.
BEGINNER TIP
Don’t worry about what the finished tags will look like while you’re making the masterboard.
Create first. Cut later.
The unexpected compositions are part of the fun.
3. Paper Patchwork
If you love quilts, you’re probably going to love this technique.
WHAT IS IT?
Paper patchwork is essentially quilting with paper.
Small squares, rectangles, strips or irregular pieces are joined together to create a patchwork design.
WHAT DO I NEED?
Paper scraps, scissors or a paper cutter, glue and—optionally—a sewing machine or fine-tip pen.
HOW DO I DO IT?
Cut or tear your scraps into different shapes and arrange them next to one another.
Glue everything down.
Then add real stitching with a sewing machine or draw little faux stitches around the pieces with a pen.
WHAT CAN I USE IT FOR?
Journal pages, covers, pockets, tags, journal cards and decorative backgrounds.
BEGINNER TIP
Try mixing papers you wouldn’t normally put together.
Old book paper next to florals. Music paper next to gingham. A plain brown paper bag next to something pretty.
That’s where the character comes from.
4. Fabric Flips
Junk journals don’t have to be made entirely from paper.
WHAT IS IT?
A fabric flip is simply a piece of fabric attached along one edge of a page so that you can lift it up and reveal something underneath.
WHAT DO I NEED?
Fabric scraps, lace, ribbon, glue or a sewing machine.
HOW DO I DO IT?
Choose a piece of fabric and attach just the top or side edge to your journal page.
Leave the rest unattached so it can be lifted.
Put something underneath it—or leave the space blank for future journaling.
WHAT CAN I USE IT FOR?
Hide journaling, photographs, quotes, little pieces of artwork or even another pocket underneath.
BEGINNER TIP
Don’t throw away frayed fabric.
Those loose threads and imperfect edges can look beautiful in a junk journal.
5. Altered Paper Clips
Sometimes the simplest supplies make the cutest embellishments.
WHAT IS IT?
An altered paper clip is an ordinary paper clip decorated with scraps, fabric, ribbon, lace, buttons or small images.
WHAT DO I NEED?
Paper clips and whatever tiny leftovers you have on your table.
HOW DO I DO IT?
Attach a small cluster of fabric, paper, lace or ribbon to your paper clip.
Keep it simple or build several layers.
WHAT CAN I USE IT FOR?
Clip one onto a journal page, photograph, tag, envelope or piece of ephemera.
And because it isn’t permanently attached, you can move it around.
BEGINNER TIP
Make these after another project.
Use whatever tiny scraps are left on your table instead of getting out new supplies.
6. Hidden Journaling Spots
One of my favorite things about junk journals is discovering what’s hiding inside them.
WHAT IS IT?
A hidden journaling spot is simply a place to write that isn’t immediately visible.
WHAT DO I NEED?
Paper, envelopes, scraps, photographs, tags or anything that can flip, fold or open.
HOW DO I DO IT?
Create a flap and write underneath it.
Put a note inside a tiny envelope.
Create a foldout.
Hide journaling behind a photograph.
There are dozens of possibilities.
WHAT CAN I USE IT FOR?
Personal thoughts, memories, quotes, dates, little stories or anything you don’t necessarily want visible when someone first opens the page.
BEGINNER TIP
You don’t need an elaborate mechanism.
A piece of paper folded in half is already a hidden journaling spot.
7. Scrap Tuck Spots
This technique is so simple that once you start making them, you’ll see tuck spots everywhere.
WHAT IS IT?
A tuck spot is a small piece attached to the page along only some of its edges, allowing you to slide something behind it.
WHAT DO I NEED?
Scraps!
Triangles, torn book pages, leftover cardstock and even pieces you’ve cut from other projects work beautifully.
HOW DO I DO IT?
Choose a scrap.
Glue only the bottom and one side—or whatever edges make sense for your design.
Leave an opening.
Slide something inside.
You just made a tuck spot.
WHAT CAN I USE IT FOR?
Tags, photographs, tickets, journal cards, notes and other ephemera.
BEGINNER TIP
Before throwing away an oddly shaped scrap, ask yourself:
Could this be a tuck spot?
You may be surprised how often the answer is yes.
8. Clusters
Those tiny scraps scattered across your table aren’t necessarily trash.
They might be your next embellishment.
WHAT IS IT?
A cluster is a small layered grouping of different materials.
WHAT DO I NEED?
Try three or four small things: paper, fabric, lace, a label, a button, a postage stamp, thread or a tiny image.
HOW DO I DO IT?
Layer the pieces so that you can still see part of each one.
Glue or stitch them together.
That’s your cluster.
WHAT CAN I USE IT FOR?
Add clusters to pages, tags, journal cards, pockets, covers or paper clips.
BEGINNER TIP
Try working with three pieces first.
A scrap of book paper + fabric + a tiny label can be enough.
More isn’t always better.
9. Imperfect Tea- and Coffee-Dyed Paper
You may have seen beautifully aged papers in junk journals and thought yours needed to look exactly like them.
They don’t.
WHAT IS IT?
Tea and coffee dyeing are simple ways of making new paper look aged, stained and worn.
WHAT DO I NEED?
Plain paper and brewed tea or coffee.
HOW DO I DO IT?
Apply the tea or coffee to your paper and allow it to dry completely before putting it into your journal.
Experiment with drips, rings and uneven areas rather than trying to make every sheet identical.
WHAT CAN I USE IT FOR?
Journal pages, tags, pockets, envelopes, writing paper, backgrounds and ephemera.
BEGINNER TIP
The wrinkles, stains, rings and uneven coloring aren’t necessarily mistakes.
Let some of the imperfections stay.
They give your paper character.
10. Scrap-Strip Pages
And finally, what about all those long, skinny pieces of paper left after trimming pages?
Don’t throw them away!
WHAT IS IT?
A scrap-strip page is a new background made by layering strips of leftover paper.
WHAT DO I NEED?
Long paper scraps, glue and a base sheet.
HOW DO I DO IT?
Lay strips horizontally, vertically or diagonally across your page.
Mix book pages, patterned paper, plain paper, music sheets and whatever else you’ve saved.
Glue everything down.
You can leave it alone or add stitching, stamping or other embellishments.
WHAT CAN I USE IT FOR?
Use the finished sheet as a journal page or cut it apart to make tags, pockets and other ephemera.
BEGINNER TIP
Don’t try too hard to coordinate everything.
Sometimes the strange combinations are the most interesting ones.
Your First Junk Journal Doesn’t Have to Be Perfect
If you’re just starting out, remember something important:
Junk journaling isn’t about having the best supplies or creating perfect pages.
It’s about experimenting.
It’s about saving something because you see possibility in it.
It’s about turning an old envelope, torn book page, leftover piece of ribbon or tiny scrap of paper into something completely different.
And sometimes the pieces we almost throw away become our favorite parts of the journal.
So before you buy another package of supplies, look through what you already have.
Pick one technique from this list.
Make something.
Let the stitching be crooked.
Let the paper tear.
Let the colors be unexpected.
And most importantly, enjoy creating it.
What’s Next?
I think some of these wonderful old-school junk journal techniques deserve another look, so we’re going to continue exploring them here on Creativity and Inspiration.
We’ll make Frankenpages, revisit masterboards, create altered paper clips, experiment with tuck spots, play with fabric and find new uses for scraps we would normally throw away.
And we’re going to start with the Frankenpage.
Because if you’ve got a box full of scraps you’ve been saving for “someday”…
Someday has officially arrived.
— Creativity and Inspiration


Leave a comment