A scrap of cotton can change the whole mood of a junk journal page. Paper gives structure, but fabric adds softness, movement, age, and a sense of touch that paper alone cannot always create. A frayed edge, a faded floral print, a tea-stained strip of muslin, or a tiny stitched cluster can make a page feel handled, loved, and layered.
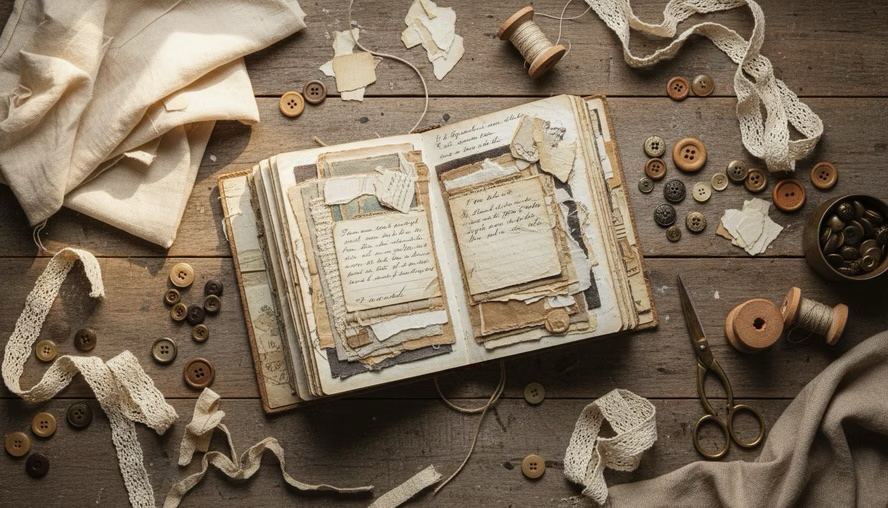
Fabric belongs naturally in junk journals because both share the same spirit. They celebrate reuse. They make beauty from leftovers. They invite mixing, tearing, stitching, folding, staining, and experimenting. A journal made with fabric pieces feels less like a flat book and more like an object with history.
Fabric has always carried memory and meaning
Before fabric became craft-room treasure, it served daily life in the most practical ways. Early textiles were made from natural fibers such as flax, wool, cotton, silk, and hemp. People spun fibers into thread, wove or knitted thread into cloth, then dyed, stitched, patched, and reused it until little remained.
For generations, fabric was valuable. Clothing was mended. Flour sacks became dresses, aprons, towels, and quilt pieces. Worn shirts became cleaning rags or quilt blocks. Scraps were saved because a small piece could still patch a knee, trim a collar, or decorate a household item.
As textile production grew, fabric became more accessible. Printed cottons, factory-woven lace, ribbons, synthetics, and blends entered everyday homes. By the 20th century, people had access to more fabric than ever, from feed sacks and curtains to old linens and clothing. That shift changed the way people crafted. Fabric was no longer only a necessity. It became a form of expression.
Quilting, embroidery, collage, slow stitching, doll making, altered books, scrapbooking, and mixed media all helped shape the way makers now use textiles. Junk journaling sits comfortably among these traditions. It borrows the thrift of patchwork, the layering of collage, and the intimacy of keepsake sewing.
A bit of fabric in a junk journal often feels personal because cloth lives close to the body and the home. It may come from a worn shirt, a grandmother’s table linen, a curtain panel, a pillowcase, or a thrifted scarf. Even when the source is unknown, fabric suggests a past life.
How fabric found its place in junk journals
Junk journals grew from a love of found papers, repurposed materials, and handmade books. Early makers used what they had: envelopes, receipts, book pages, maps, ledger sheets, packaging, postcards, and coffee-dyed paper. Fabric entered naturally because it was another beautiful scrap too good to throw away.
At first, many journalers used fabric in small ways. A strip of lace on a page edge. A ribbon closure. A fabric tab. A muslin pocket. A stitched snippet on a tag. These touches softened the hard lines of paper and made pages feel more dimensional.
As the style developed, fabric became more than a decoration. Makers began creating:
- Full fabric pages
- Fabric-covered journal covers
- Textile pockets and tuck spots
- Ruffled trims and pleated edges
- Fabric clusters
- Slow-stitched embellishments
- Stamped muslin labels
- Napkin and fabric collage panels
- Quilted journal cards
The appeal is easy to understand. Fabric solves several common design problems in junk journals. It covers awkward seams. It strengthens fragile paper. It adds color without needing more printed images. It gives plain pages a tactile focal point. It also helps a journal feel cohesive when similar scraps repeat throughout the book.
Fabric invites imperfection, which fits junk journals beautifully. A frayed edge looks intentional. Uneven stitching adds charm. A faded stain can become part of the story.
The best fabrics for junk journals and what each one does well
Almost any fabric can work in a junk journal, but some behave better than others. The best choice depends on the purpose. A full page needs flexibility. A tab needs strength. A ruffle needs drape. A stamped piece needs a tighter weave.
| Fabric | Best uses | Unique qualities |
| Cotton quilting fabric | Pages, tabs, pockets, clusters, trims | Easy to cut, sew, glue, tear, and layer |
| Muslin | Stamped labels, slow stitching, neutral pages | Soft, plain, affordable, and easy to stain |
| Linen | Covers, page panels, pockets, rustic accents | Strong texture, natural look, elegant fray |
| Lace | Borders, pockets, overlays, clusters | Sheer, decorative, light, and vintage feeling |
| Cheesecloth | Texture layers, mixed media, aged effects | Loose weave, airy, easy to distress |
| Canvas | Covers, strong pockets, stiff tags | Durable, sturdy, holds paint and ink well |
| Silk or sari scraps | Special accents, flips, soft tabs | Lightweight, luminous, rich movement |
| Denim | Covers, tabs, rugged pockets | Strong, casual, great with visible stitching |
| Flannel | Cozy layers, soft pockets, winter journals | Warm texture, compresses well |
| Tulle or netting | Transparent overlays, shaker pockets, clusters | Lightweight, airy, adds depth without bulk |
Cotton deserves special mention because it is the easiest starting point. It tears into straight strips along the grain, takes tea or coffee staining well, and works with most glues. Quilting cotton also comes in endless prints, so it can match botanical, vintage, farmhouse, romantic, seasonal, or grungy styles.
Muslin is the quiet hero of fabric journaling. It can look rustic, delicate, or aged depending on how you treat it. Stamp on it with permanent ink, stitch around the edges, or layer it behind a paper focal image.
Lace works best when used with restraint. A little lace can make a page feel delicate. Too much can add bulk and catch on other pages. Flat lace trims usually work better than thick gathered lace inside signatures.
Cheesecloth creates instant texture. Pull the threads apart, stain it, and tuck it under labels or images. Its loose weave helps it blend into paper collage rather than sitting heavily on top.
Denim, canvas, and upholstery fabric need care because they add weight. Use them for covers, spine reinforcement, or sturdy tags rather than every page. Thin worn denim from old shirts often works better than thick jeans seams.
Synthetic fabrics can work, too, especially sheer curtains, organza, and polyester lace. Test them first. Some melt under heat, resist glue, or fray in unpredictable ways.
Different fabrics create different moods, from rustic muslin to sturdy denim.
How to create full fabric pages that work inside a journal
Full fabric pages can feel magical, but they need a little planning. A page made only from cloth behaves differently from paper. It can stretch, wrinkle, sag, or bulk up at the spine. The goal is to keep the page flexible enough to turn and strong enough to hold embellishments.
Choose the right base
A full fabric page works best with one of these bases:
- Two layers of cotton stitched together
- Fabric fused to lightweight paper
- Fabric backed with thin interfacing
- Muslin layered with lace or printed cotton
- A fabric panel sewn onto a paper hinge
For soft journals, two layers of cotton or muslin stitched wrong sides together can make a lovely page. For more structure, bond fabric to thin book page, copy paper, or pattern paper with a glue stick, matte medium, or fusible web.
If the fabric is very thin, add a backing. If it is thick, leave it unbacked and use fewer embellishments.
Cut with the spine in mind
Fabric pages need room to move. Cut them slightly smaller than the paper pages in the same signature, especially along the fore edge. A fabric page that hangs out too far can wrinkle or snag.
Before you sew a fabric page into a signature, fold it and press the fold with an iron. This helps it behave like a page rather than a loose scrap.
For a stronger fold, stitch a narrow line about 1/8 inch from the spine fold. This gives the page a soft hinge and reduces stretching.
Finish the edges or let them fray
Both choices can look beautiful.
A clean edge works well for elegant journals. Use a straight stitch, zigzag stitch, blanket stitch, or narrow hem. A raw edge suits grungy, botanical, farmhouse, and vintage styles. Pull a few threads loose to encourage fraying, then stop before the edge weakens too much.
If the page will get handled often, sew around all four sides. Even a simple straight stitch gives the fabric more stability.
Use fabric pages with purpose
A full fabric page should do something. It can act as a divider, a pocket page, a texture break, or a soft background for a focal image.
Try these ideas:
- Stitch a paper pocket onto a fabric page.
- Add a lace belly band across the center.
- Sew three sides of a fabric rectangle to make a textile pocket.
- Attach a small envelope with hand stitches.
- Stamp words or botanicals onto muslin.
- Add a safety pin, button, or tiny charm near the top.
- Use the page as a resting place between busier paper spreads.
Fabric pages tend to feel special, so they work well near the center of a signature or at the start of a themed section.
Fabric trims make page edges feel finished
Fabric page border trims are one of the easiest ways to add texture without rebuilding a page. They also help strengthen page edges, hide rough cuts, and create a repeated design element through the journal.
A border trim can be neat, shabby, ruffled, pleated, layered, or stitched flat. It can run along the outer edge of a page, across the bottom, around a pocket, or down the side of a tag.
Make a simple torn fabric edge
Cut a small snip into cotton, then tear the strip by hand. Tearing follows the grain and creates a soft feathered edge.
Use strips about 1/2 inch to 1 inch wide for page edges. Glue or stitch the strip along the paper edge, then trim the ends flush with the page.
For a stronger edge, fold the strip over the page like binding. Glue one side first, fold it around the edge, then stitch through all layers.
Layer lace over cotton
Cotton gives body. Lace gives detail. Together, they make an easy border.
Place a torn cotton strip along the page edge, then add narrow lace on top. Stitch down the center or along both edges. If the lace has a scalloped side, let that side extend slightly past the paper.
This works especially well on tea-dyed paper, book pages, and botanical spreads.
Create a gathered ruffle
A gathered ruffle adds movement and softness. Use a long strip of lightweight cotton, lace, sari silk, or muslin.
With a sewing machine, set the stitch length long and sew a line near one edge without backstitching. Pull one bobbin thread gently to gather the fabric. Adjust the gathers until the ruffle fits the page, then stitch it in place.
For hand sewing, use a running stitch. Make the stitches long and loose, then pull the thread to gather. Knot the ends once the ruffle fits.
A ruffle can add bulk, so choose its location carefully. Use it on outer page edges, journal covers, removable tags, or the front of a signature rather than deep inside every spread.
Ruffles and edge trims can be sewn by machine or gathered by hand.
Fabric clusters give small scraps a starring role
Fabric clusters are small layered embellishments made from scraps. They are ideal for using tiny pieces that feel too pretty to throw away. A cluster might include muslin, lace, thread, book paper, a button, a stamped word, and a bit of sari silk.
The best clusters have contrast. Pair rough with delicate, plain with patterned, light with dark, matte with shiny.
Build a basic fabric cluster
Start with a base piece about 1 1/2 inches wide. Muslin, linen, or cotton works well. Add two or three smaller layers on top. Let each layer peek out from a different side.
Then add one focal detail:
- A button
- A tiny label
- A stamped word
- A postage stamp
- A paper flower
- A small charm
- A torn book text piece
- A snippet of embroidery
Stitch through the center by hand or machine. A messy cross stitch, a few straight lines, or a small X can hold everything together.
Keep clusters usable
Clusters should add depth, not prevent the journal from closing. Press layers flat with your fingers before stitching. Avoid large beads inside signatures unless the journal has plenty of room.
Use thicker clusters on covers, journal cards, and removable tags. Use flatter clusters on pages.
Good places for fabric clusters include:
- Page corners
- Pocket fronts
- Tag tops
- Belly band ends
- Journal card edges
- Envelope flaps
- Hidden paper clips
- Cover closures
A cluster can also anchor a page design. If a spread feels scattered, add one small fabric cluster near the focal point. It helps connect the layers.
How to stiffen fabric without losing its character
Soft fabric drapes well, but sometimes a junk journal project needs stiffness. Tags, tabs, pockets, and journal cards need enough body to survive handling.
The trick is to stiffen the fabric while keeping the texture visible.
Back fabric with paper
The simplest method is gluing fabric to paper. Use thin cardstock, book page, kraft paper, or manila folder. Apply glue evenly, smooth the fabric from the center outward, and let it dry under a heavy book.
Once dry, cut it into tags, tabs, pockets, or journal cards. Stitch around the edges to prevent lifting.
This method creates sturdy pieces while keeping one side soft.
Use fusible interfacing
Fusible interfacing bonds to fabric with heat. It comes in different weights. Lightweight interfacing works well for journal pages and tabs. Medium-weight interfacing suits tags and pockets.
Always use a pressing cloth, especially with delicate or synthetic fabrics. Press rather than slide the iron, since sliding can stretch the fabric.
Try starch or diluted glue
Fabric stiffener, spray starch, or a diluted white glue mixture can add body. Brush or spray the fabric, shape it, and let it dry flat.
This works well for muslin labels, cheesecloth texture pieces, and pleated trims. Test first, because some products darken fabric or leave a shine.
Stitch for structure
Stitching stiffens fabric more than many makers expect. A line of stitching around an edge helps fabric hold its shape. Several rows of stitching can turn a soft scrap into a strong tab or label.
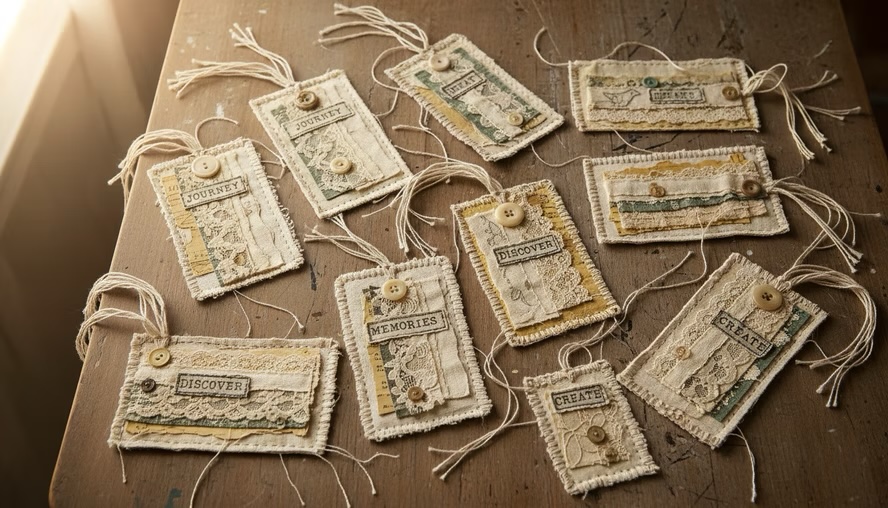
For tags and journal cards, stitch a grid, border, or random lines across the fabric. The thread adds strength and visual detail at the same time.
Pleated trims add rhythm and texture
Pleated trims have a tidy, dimensional look. They work beautifully along page edges, pocket tops, and journal covers. Unlike gathered ruffles, pleats create repeated folds that feel more structured.
Make pleated trim with a sewing machine
Cut a long fabric strip. Lightweight cotton, muslin, lace, and sari silk all work well. Press the strip if needed.
Fold a small pleat with your fingers, then stitch over it. Fold the next pleat in the same direction, stitch again, and repeat. Keep the needle down while adjusting the next fold so the trim stays in place.
A few useful sewing machine tricks:
- Use a longer stitch length for soft, aged-looking trims.
- Slow down so each pleat stays even.
- Use a stiletto, awl, or seam ripper tip to guide folds near the presser foot.
- Chain piece several strips without cutting thread between them.
- Sew pleats onto a narrow paper strip if the fabric is slippery.
- Use contrasting thread when you want the stitching to show.
For a shabby look, do not measure every fold. Let the pleats vary slightly. For a cleaner look, press each fold before sewing.
Make pleated trim by hand
Hand-sewn pleats look charming and work well when a sewing machine feels too heavy for a small piece.
Fold the first pleat, then secure it with two or three tiny stitches. Fold the next pleat and repeat. A running stitch through the top edge can hold the pleats in place. For extra strength, stitch back through the pleats a second time.
Hand-sewing tricks that help:
- Use clips instead of pins for delicate lace.
- Wax the thread to reduce tangles.
- Knot between sections if the trim is long.
- Work on a felt mat or folded towel so the fabric does not slide.
- Use small stitches on the front and longer stitches on the back.
Pleated trims can become bulky, so use them as feature details. One pleated edge in a signature often has more impact than five crowded ones.
Fabric makes layering richer on pages, tags, and journal cards
Layering sits at the heart of junk journaling. Paper layers add color, text, and shape. Fabric layers add touch.
A small fabric scrap under a focal image can make the whole piece feel finished. It creates a soft shadow and separates the image from the background. This helps especially when many paper pieces have similar colors.
Fabric also breaks up flat surfaces. A plain tag can become interesting with a torn muslin strip, a stitched label, and a bit of lace at the top. A journal card can feel more complete with fabric stitched along one side. A pocket can look older with frayed cotton peeking from behind it.
Try these layering combinations:
Book page, muslin, botanical image
Kraft paper, denim, number label
Tea-dyed paper, lace, pressed-flower image
Ledger paper, canvas, stamped word
Patterned paper, sari silk, button
Soft vintage look for journal cards
Strong rustic style for tags
Delicate page embellishment
Neutral masculine or farmhouse feel
Rich accent for covers or closures
Fabric can also soften bold prints. If a scrapbook paper feels too bright, add a sheer fabric layer, cheesecloth, or pale lace over part of it. If a page feels too pale, add a darker fabric tab or stitched strip.
Tags and journal cards benefit from fabric because they get handled. A stitched fabric topper makes a tag easier to pull from a pocket. A fabric hinge lets a journaling card flip open. A cloth tab marks a hidden spot without adding a bulky metal clip.
Fabric layers help tags and journal cards feel sturdy, soft, and finished.
Fabric can be stamped, painted, decoupaged, and marked
Fabric does not have to stay in the background. It can become a surface for mark making, stamping, painting, and decoupage.
Stamp on fabric
Muslin, linen, and tight-weave cotton take stamping well. Use permanent ink when possible, especially if the fabric may touch glue or wet media later.
Press the stamp down firmly but avoid rocking it. Fabric has texture, so the image may look softer than it does on paper. That softness often fits junk journals beautifully.
Good stamp choices include:
- Script
- Numbers
- Botanicals
- Postmarks
- Labels
- Simple line art
- Small patterns
Stamped fabric labels look wonderful on pockets, clusters, tabs, and covers.
Use fabric for mark making
Fabric can create marks on paper, and paper can inspire marks on fabric. Dip the edge of a fabric scrap into watered-down paint or ink, then drag it across a page. Use lace as a stencil. Press bubble-textured fabric into paint and stamp with it. Wrap thread around a scrap of cardboard, ink it, and press it onto muslin.
Canvas and denim hold bolder marks. Cheesecloth creates broken, organic texture. Lace gives delicate pattern.
These marks help a journal feel handmade without needing perfect drawing skills.
Decoupage napkins onto fabric
Paper napkins are popular in junk journals because they are thin, colorful, and easy to blend into backgrounds. They also decoupage well onto fabric.
Separate the printed top layer of the napkin from the plain backing layers. Brush a thin coat of matte medium or decoupage glue onto muslin or cotton. Lay the napkin gently on top, then smooth it with a dry brush or a piece of plastic wrap. Add another thin coat over the surface.
Once dry, the fabric keeps some flexibility, but gains a printed design. Use it for pockets, covers, tags, clusters, or full pages.
Napkin-covered fabric can wrinkle, and that is part of its charm. If you want a smoother finish, work slowly from the center outward and use very little medium.
Paint and dye fabric scraps
Tea and coffee staining can age bright fabric. Acrylic paint can mute a bold print. Ink sprays, walnut ink, and watered-down craft paint can add depth.
For a grungy look, stain fabric unevenly and let it dry crumpled. For a softer vintage look, rinse after staining and press flat.
Always test first. Some fabrics shrink, bleed, or repel liquid.
Glue, stitch, or both
Junk journals welcome mixed methods. Some fabric pieces only need glue. Others need stitching. Many benefit from both.
Glue works well for flat pieces, hidden layers, and fabric backed with paper. Fabric glue, tacky glue, glue stick, matte medium, and double-sided tape can all work depending on the material.
Stitching works better for trims, tabs, clusters, and pieces that will be handled often. It adds strength and decoration at the same time.
A useful approach is to place fabric with a small amount of glue, let it dry, then stitch it. This prevents shifting under the sewing machine or while hand sewing.
Be careful with wet glue. Too much can soak through fabric and leave shiny patches. Apply thin layers and spread them evenly.
If sewing through glued fabric, wait until the glue fully dries. Wet glue can gum up a needle. If the needle gets sticky, wipe it with a bit of rubbing alcohol and let it dry before sewing again.
How to manage bulk so the journal still closes
Fabric adds depth, and depth adds bulk. That is part of the appeal, but a journal still needs to function.
Plan bulky fabric elements the same way you would plan chunky charms or layered pockets. Spread them throughout the book instead of stacking them in one area. If one page has a ruffle, keep the facing page simpler. If a cover has a thick cluster, use flatter embellishments inside.
A few practical habits help:
- Use thin fabric inside signatures.
- Save thick fabric for covers and removable pieces.
- Trim seam allowances close when layering.
- Avoid placing bulky trims near the spine.
- Press fabric pages and trims before adding them.
- Make fewer, better clusters instead of many heavy ones.
- Test the journal closure as you work.
A little bulk feels lovely. Too much bulk can strain the binding and make pages hard to turn.
Small fabric ideas that make a big difference
Not every fabric feature needs to dominate a page. Small touches often create the most pleasing results.
Try adding fabric in these simple ways:
- Tie sari silk or cotton through a tag hole.
- Sew a muslin word label onto a pocket.
- Add tiny lace tabs to page edges.
- Wrap a journal card with a strip of torn fabric.
- Make a fabric hinge for a flip-out page.
- Cover a paper clip with stitched scraps.
- Stitch a fabric strip across an envelope flap.
- Add cheesecloth behind a focal image.
- Use denim as a pull tab.
- Sew a row of scrap squares into a mini patchwork strip.
Repeating one fabric throughout a journal gives the book unity. For example, use the same tea-stained muslin for tabs, labels, and clusters. The pages can vary, but that repeated cloth creates a quiet thread through the whole journal.
Fabric brings depth that paper cannot create alone
Fabric changes the way a junk journal feels in the hand. It adds lift, shadow, softness, weight, and sound. A page with cloth turns differently. A tag with a stitched topper feels sturdier. A border with frayed cotton invites touch. A stamped muslin label looks aged in a way printed paper often cannot match.
The best part is that fabric does not require perfect technique. Torn edges, loose threads, uneven stitches, faded stains, and soft wrinkles all belong. They make the journal feel personal and alive.
Start small if full fabric pages feel intimidating. Add a muslin tab, a lace border, or a tiny stitched cluster. Then try a fabric-backed tag, a pleated trim, or a napkin-decoupaged pocket. Each piece teaches how cloth behaves with paper, glue, thread, ink, and time.
Fabric gives junk journals another layer of story. It holds color, texture, and memory. When used with care, it turns pages into keepsakes that ask to be opened, touched, and explored.


Leave a Reply