Junk journals offer a creative way to capture memories, thoughts, and inspiration using recycled and found materials. They invite you to craft a unique book filled with personality and charm, unlike any traditional journal. If you’re new to this art form, this guide will walk you through everything you need to know to start your own junk journal, from understanding what it is to making your first cover and assembling your pages.
What Is a Junk Journal and Why Use One?
A junk journal is a handmade book created from a mix of recycled papers, ephemera, fabric scraps, and other found objects. Unlike a standard notebook, it’s a collage of textures and stories, often reflecting the creator’s personality or a specific theme. The purpose of a junk journal can vary widely:
- Memory keeping: Collecting photos, ticket stubs, and notes.
- Art journaling: Using mixed media to express creativity.
- Writing: Capturing thoughts, poems, or daily reflections.
- Organizing: Combining planner elements with creative touches.
The charm of junk journals lies in their imperfect, eclectic nature. They encourage creativity and resourcefulness, making them perfect for beginners who want to experiment with paper crafts without needing expensive supplies.
The Origins and History of Junk Journals
Junk journaling has roots in the tradition of scrapbooking and altered books, but it gained popularity in the early 2000s as a DIY craft movement. People began repurposing old books, vintage papers, and discarded materials to create personalized journals. The term “junk journal” reflects the use of “junk” or found items that might otherwise be thrown away.
Historically, similar practices existed in the form of commonplace books, where people collected quotes, recipes, and notes. Junk journals modernize this concept with a focus on artistic expression and sustainability. Today, the community around junk journaling shares ideas online, inspiring newcomers to embrace this creative outlet.
How the Use of a Junk Journal Influences Its Size
The intended use of your junk journal will guide its size and format. Here are some common considerations:
- Travel journals: Smaller sizes like 5×7 inches or pocket-sized journals are easy to carry.
- Art journals: Larger sizes such as 8×10 or 9×12 inches provide more space for drawing and mixed media.
- Memory books: Medium sizes around 6×8 inches balance portability and space for photos and memorabilia.
- Daily planners: Sizes similar to standard notebooks (A5 or letter size) work well for writing and organizing.
Choosing the size early helps you select materials and plan your signatures (groups of pages) accordingly.
Step-by-Step Guide to Creating a Junk Journal Cover
The cover is the face of your junk journal and sets the tone for what’s inside. Here’s how to make a sturdy, beautiful cover:
Materials Needed
- Chipboard or thick cardboard (for base) Empty boxes are great.
- Decorative paper or fabric (for covering)
- Glue (PVA or craft glue)
- Scissors or craft knife
- Bone folder or ruler (for creasing)
- Ribbon, lace, or buttons (optional embellishments)
Steps
- Cut the base: Measure and cut two pieces of chipboard for the front and back covers. Add a spine piece if you want a thicker journal.
- Prepare the covering material: Cut decorative paper or fabric slightly larger than the chipboard pieces to wrap around edges.
- Glue the covering: Apply glue evenly on the chipboard, then place the decorative material on top. Smooth out wrinkles with a bone folder or ruler.
- Wrap edges: Fold the excess paper or fabric over the edges and glue them down on the inside.
- Assemble the cover: Attach the front, back, and spine pieces together with glue or tape, leaving small gaps for flexibility.
- Add embellishments: Attach ribbons, buttons, or lace to personalize your cover.
Your cover should feel sturdy but flexible enough to open and close easily.
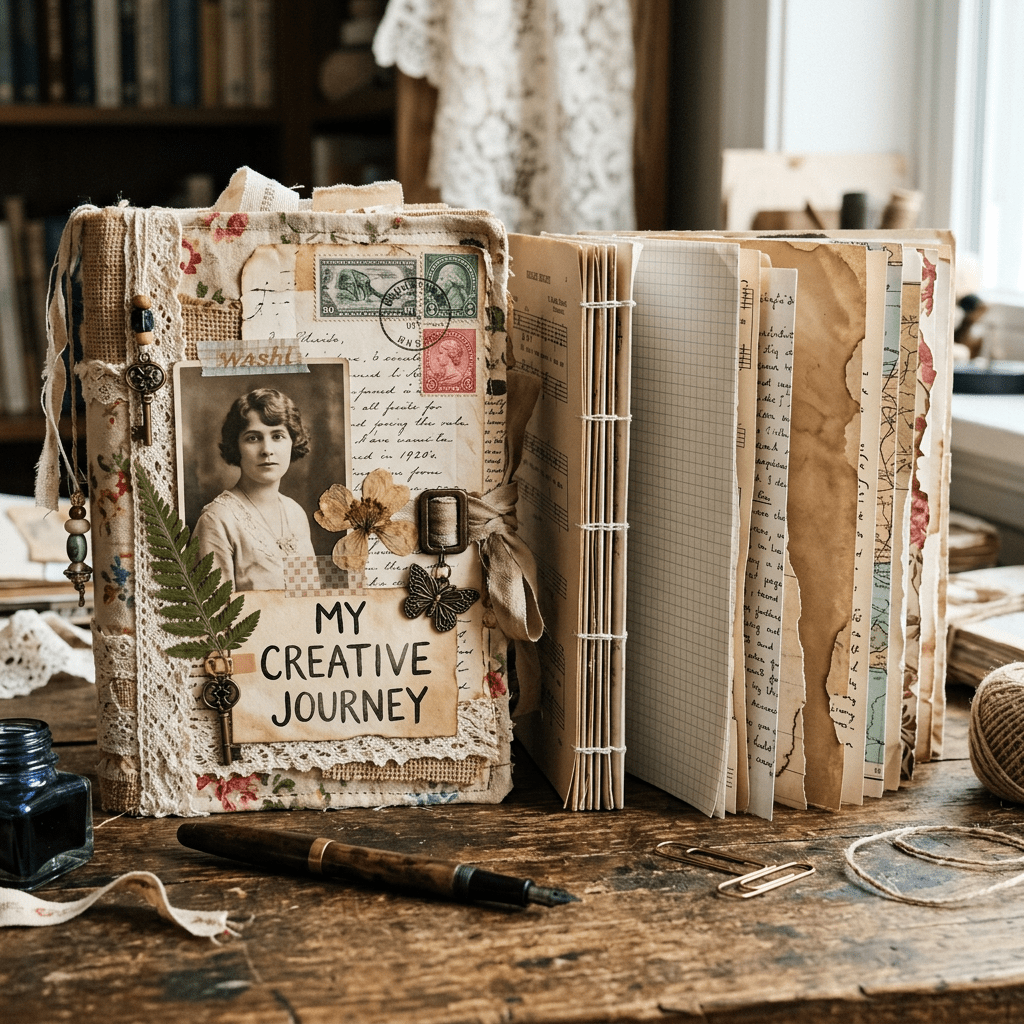
Handmade junk journal cover with fabric and lace
Understanding Junk Journal Signatures and Paper Types
A signature is a group of folded pages sewn or bound together inside the cover. It forms the core of your journal’s content.
What Papers Can You Use?
Junk journals thrive on variety. You can include:
- Scrapbook paper
- Old book pages
- Music sheets
- Envelopes
- Wrapping paper
- Vintage ephemera like old letters, tags, tickets, magazines etc…
- Notebook or ledger pages
- Handmade or textured paper
Mixing different textures and weights adds interest and tactile appeal.
How Many Papers Should Be in a Signature?
A typical signature contains between 4 to 8 folded sheets, which equals 16 to 32 pages when counted front and back. The exact number depends on:
- Thickness of the paper (thicker paper means fewer sheets)
- Size of the journal
- Sewing method (some stitches work better with fewer pages)
Attaching Signatures to the Cover
There are several ways to attach signatures:
- Sewing: Using a needle and strong thread, you can sew signatures directly into holes punched in the spine or cover.
- Binding rings: Punch holes and use metal rings to hold signatures inside the cover.
- Glue: Attach signatures to the spine with strong glue, though this is less durable.
- Elastic bands or ribbons: Wrap around the spine to hold signatures in place, allowing easy removal.
Sewing is the most traditional and secure method, giving your journal a handmade feel.
Sizes of Papers in a Signature
Papers in a signature don’t have to be uniform. You can mix sizes for a layered, dynamic look:
- Full-size pages (matching the journal size)
- Smaller inserts or tags
- Folded pockets or envelopes
- Cutouts or die-cuts
This variety encourages interaction and adds surprise elements to your journal.
When to Decorate Your Signature
Deciding when to decorate your signature depends on your workflow:
- Before sewing: Decorating pages before assembling allows easier access and less risk of damaging sewn areas.
- After sewing: Decorating after assembly lets you see how pages interact and add embellishments that span across pages.
Many junk journal makers decorate a little before and a little after sewing to balance ease and creativity.

Leave a comment