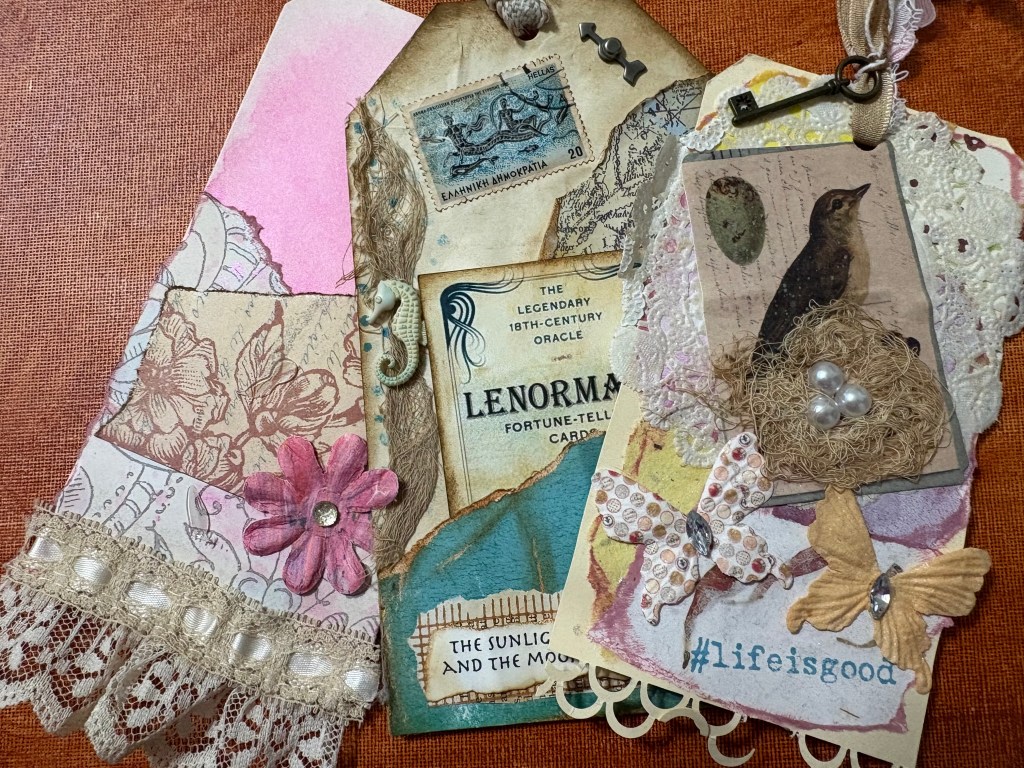
Creating beautiful and personalized junk journals can be a fulfilling artistic endeavor. One unique way to enhance your pages is by layering tags made from paper and fabric. This technique offers various textures and visual interest, making your journal even more special. Here’s an informative guide on how to effectively layer tags in your junk journals.
Materials You’ll Need
To get started, gather the following supplies:
- Various types of paper (e.g., patterned scrapbook paper, vintage book pages, plain cardstock)
- Fabric scraps (e.g., cotton, lace, burlap)
- Scissors
- Glue or double-sided tape
- A sewing machine or needle and thread (optional, for added texture)
- Decorative elements (e.g., stamps, stickers, washi tape)
Step-by-Step Process
1. Cut Your Tags
Start by cutting your tags out of paper. Use a variety of shapes and sizes to create a dynamic look. Traditional tag shapes include rectangles and circles, but feel free to get creative with your designs.
2. Prepare Fabric Layers
Cut your fabric scraps into smaller pieces that can be layered on top of your paper tags. Consider using fabrics with different textures and patterns to add depth. For example, a piece of lace can contrast beautifully against a more solid piece of fabric.
3. Arrange the Layers
Before attaching anything, lay out your paper and fabric pieces to see how they look together. Experiment with different arrangements by layering fabrics underneath or on top of the paper tags. This step allows you to find the perfect combination before committing to glue.
4. Adhere the Layers
Once you’re satisfied with the arrangement, start adhering the layers together. If using glue, apply a thin layer to prevent wrinkling. Double-sided tape is a neat alternative that can provide a clean look. For added durability, sew around the edges of your tags.
5. Add Decorative Elements
Now that your base layers are set, it’s time to embellish! Use stamps, stickers, or washi tape to add personality and color to your tags. These little touches can help tell a story and make each tag truly unique.
6. Attach to Your Junk Journal
Finally, attach your completed tags into your junk journal. You can glue them directly onto your pages, use paper clips for a temporary option, or attach them with string for a more playful look.
Tips for Success
- Mix Textures: Combining different textures can create a richer visual experience. Try mixing soft fabrics with rough paper.
- Color Palette: Stick to a cohesive color palette to ensure that your tags complement the overall theme of your junk journal.
- Layering Techniques: Don’t be afraid to experiment with different layering techniques, like offsets or overlapping pieces, to create more varied looks.
Conclusion
Layering tags with paper and fabric can enhance the beauty and personal touch of your junk journals. This technique not only allows for creativity but also results in functional additions that can hold memories, notes, or photographs. With some basic materials and a bit of inspiration, you can create stunning layered tags that will take your junk journal to the next level. Happy crafting!

Leave a comment